We expect incubators to function 24/7 without disruption – and with the highest levels of accuracy from the sensors in particular, on whose outputs the hatchery manager relies for many years. However as a result of age or the accumulation of dirt, sensors do become less accurate over time and their read-outs need to be routinely checked against a control: a certified reference sensor. This reference check of the sensors installed in hatchery equipment is an essential component of good, preventive hatchery maintenance.
First line preventive maintenance includes cleaning the sensor and its hardware, such as sensor protection filters and boxes. Secondly, the output of the cleaned sensor should be compared regularly to the output of a certified reference sensor, which can be purchased or hired from the manufacturer. If the output during these routine checks deviates from the output of the reference sensor, a calibration procedure must be initiated.
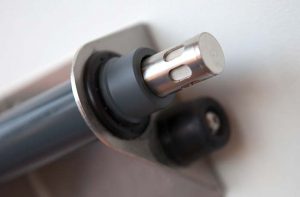 The calibration procedure is part of approved good-practice hatchery protocols, which provide an assurance of (1) standardized environmental (temperature, airflow, etc) conditions and (2) standardize the physical position of both the certified calibration sensor and the sensor to be calibrated to optimise performance. If, during calibration, the output of the hatchery sensor deviates too much from the certified reference value, then the sensor needs either to be replaced or returned to the supplier for validation. In a few cases, especially for sensors applied in pressure control systems, readouts can be adjusted using a ‘zero adjustment knob’.
The reference sensor is highly precise, replicating output values within very narrow ranges of the input value every time. For example, if a temperature reference sensor is placed in a liquid precisely controlled at 37.8 °C (100 °F), the output of the reference sensor should be 37.8°C, +/- 0.05 °C (0.09 °F). The accuracy of the reference sensor’s readout is determined by an official accredited certification body or institution. All sensors used for reference and calibration must be accompanied by the relevant official certification.
Steps for calibrating incubator sensors
Always take your time when calibrating incubator sensors and read the manufacturer’s instructions carefully. Be aware that there could be several reasons for a difference between the readings of individual temperature, carbon dioxide and relative humidity sensors and their reference units. To achieve accurate calibration, follow the advice below:
- Read the manufacturer’s manual to establish whether factory calibration included the complete system or the sensor only.
The output of most sensors installed in modern incubators is based on electrical signals (resistance, ampere or voltage) and in fact, the sensors are part of a complete system, including wires to display boards. - Clean sensors and sensor protection boxes/filters before starting the reference measurement or calibration procedure.
- Replace protection filters regularly as a routine part of your preventive maintenance protocol.
- Test whether air movement around the sensors influences output values and readings.
- Make sure that sensors are dry. Evaporating liquids, for example, will significantly influence the temperature measured by the sensor.
- Ensure that recommended stabilization times are observed, to allow reference sensors to adapt to the ambient climate.
- Prevent too much fluctuation in measured values by placing empty trolleys in the incubators.


