The poult start is an extension of the hatching process. The whole process, including poult placement, is only as strong as its weakest link.
William Alexander – Technical Service Representative, Hybrid Turkeys
To begin, a good quality egg is needed that is consistently monitored through the incubation and hatching process. After hatching, the poults must be supported by keeping them at the correct body temperature, 103-104 °F (39.4-40.0 °C), throughout the processing and holding period. The poults also need to be monitored during the trucking and delivery process. The hatching and delivery process is supported by having the correct access to feed and water upon arrival at the farm. There also needs to be the correct heat and ventilation exchange on the farm. If the birds arrive too hot or too cold, there should be a plan in place to allow the birds to recover without adding additional stress.
Flip-overs can be caused by many factors:
- chilling or overheating the birds in the hatchery or on the truck to the farm;
- overcompensating with high temperatures when the birds do not want to move, eat or drink at the farm;
- prolonged over-heating resulting in the birds panting becoming dehydrated and flipping.
Flock uniformity, health, and overall performance can be compromised from the very start.
Key actions at the hatchery
The hatch window is a tool that can help to evaluate the incubation and hatch profiles to avoid overheating of poults. It is done by checking the number of poults that have hatched at specific times before the hatch is pulled. At 36 hours, the hatch target should range 1-2% for single stage and 1-5% for multistage hatchers. At 24 hours, the number of poults hatched should not exceed 15%, and at 12 hours the target should be 95% (Lopez, 2016).
It is important to monitor eggshell temperature frequently and adjust incubator settings as needed to achieve temperature targets. The goal is to have the eggshell temperature below 100 °F (37.8 °C) throughout the hatching process. Poults exposed to higher temperatures in the incubator often have high internal body temperatures. For example, an egg exposed to a temperature over 101 °F (38.3 °C) can produce poults with temperatures in the range of 106 °F (41.1 °C) or higher, at the time of pull. Our goal is to have poult vent temperatures from 103-104 °F (39.4-40.0 °C) (Lopez, 2016). Vent temperatures should be taken at time of pull, during servicing, and in the holding room. Poults that have been overheated do not want to eat or drink and are prone to flipping. A poult’s immune system begins to develop when they eat and drink. If birds come into the barn and don’t eat or drink immediately, this leaves them more susceptible to disease. The goal of every hatchery is to produce poults of excellent quality, and this is reflected in low mortality after placement and ideal production performance.
Key actions at the farm
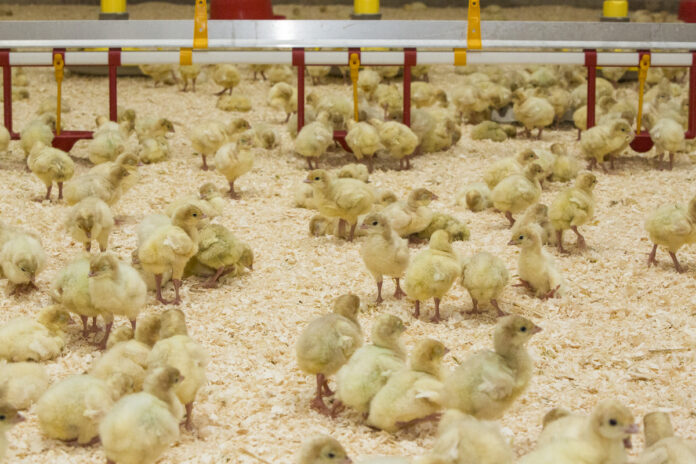
Poult activity must be monitored once placed at the farm. They should be alert and active while also seeking out food and water. It is beneficial to assess poult temperature upon arrival to the farm and 6-12 hours after placement to ensure they are comfortable in their environment. Behavioral changes are also a good indicator of poult comfort. For example, if the birds are huddling they are too cold. If they are panting or have open wings, they are too hot. In 2016, Dr. Vern Christensen did a study with tom placements looking at delivery temperature versus 7-day body weight and 7-day mortality. It was shown that poult temperatures between 103-104 °F (39.4-40.0 °C) had the most consistent body weights and most consistently low 7-day mortality (Christensen, 2016).
Heat is our friend but try not to be over-reactive. If the poults are too cool at delivery, room temperature can be raised a couple of degrees as needed but avoid big jumps in temperature. The average floor temperature across the feed and water shouldn’t exceed 95-96 °F (35-35.6 °C). If it becomes too warm, there is no place for the poults to find their comfort zone, thus producing added stress on the birds. The heat should be reduced 8-10 hours after placement back to a normal 92-94 °F (33.3-34.4 °C) floor temperature.
If poults will not stop flipping, building a hospital pen can help get the birds back on their feet. They must be put in the pen before they are dehydrated and completely exhausted to be effective. These pens shouldn’t be a part of a regular routine. Needing to use these pens means that some place in the poult’s chain of being hatched, processed, delivered, or brooded, there was an issue that needs to be corrected.
In the event there is extreme heat and the poults are hot, the heater system should be cycling enough to produce the correct floor temperatures. The ventilation system should be set to run on thermostat, not just on a minimum ventilation timer. It is important to frequently monitor the poults’ behavior and body temperatures. If the birds act cold, increase the room and floor temperatures. Even in very warm conditions, some preheating of litter is needed to maintain proper heat ranges. Newer brooders can run their electronic heating systems with the barn’s computer timer. To ensure the stoves are cycling, the heater and target temperature can be set the same, but the heat can be set to go off ½ degree above the set temperature for the first 8-12 hours.
Hybrid recommends preheating the barn 72 hours pre-placement in the winter so that the barn is up to temperature 24 hours before the birds arrive. It is important for floor temperatures to be 92-94 °F (33.3-34.4 °C) across the feed and water. At day 5, it is recommended barn temperature be 88 °F (31.1 °C) and down to 87 °F (30.5 °C) at day 7. Following the Hybrid temperature guideline will encourage poults to seek out food and eat in the first week. This helps performance exponentially throughout the grow period. If poults are acting lethargic, it is important to check to see if there are high carbon gases in the barn. Carbon Dioxide (CO2) should be less than 2500 ppm and Carbon Monoxide (CO) should be less than 20 ppm (Christensen, 1995). Above these levels, poults can feel cold. Light intensity also helps to make the birds active and encourages eating because it provides a clear view for the birds to find feed and water. People are a poor judge of light intensity, so it is important to measure. It is recommended 8-10 ft candles, 80-100 lux the first 5-7 days.
Easy access to feed and water can reduce flipper issues. Poults that eat and drink start to absorb their yolk sacs. Using paper to attract poults to feed and water the first 2 days is a great tool to reduce dehydration and compacted crops. Compacted crops in early breeder age hatches can be the result of poults finding feed but not water. This results in birds tipping over due to too much feed with no moisture. There are very good hydration products that have been proven to enhance starts on flocks that have next day deliveries.
The culmination of incubation, hatching, delivery, and barn preparation all play a role in the overall success or failure of a poult start. The key is to have monitoring systems in place, such as hatch windows, poult temperatures, with proper trucking and brooder temperature monitoring. Everything will not always be perfect, so it is important to have an idea of what to do in advance of poult placements.
References
J. Lopez, “The relationship between yolk-free body mass and subsequent performance.” International Hatchery Practice, 2016, pp. 17.
V.L. Christensen et al., “Exposure to Excessive Carbon Dioxide: A Risk Factor for Early Poult Mortality,” Journal of Applied Poultry Research 4:3 (Fall 1995): 249-253.
V. Christensen, “Assessing Poult Quality,” Midwest Poultry Presentation, 2016.
From the Proceedings of the Midwest Poultry Federation Convention 2021


